Installation Photos of Pro Cyc Green Screen
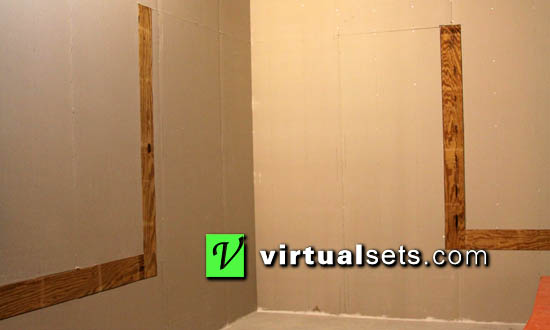 |
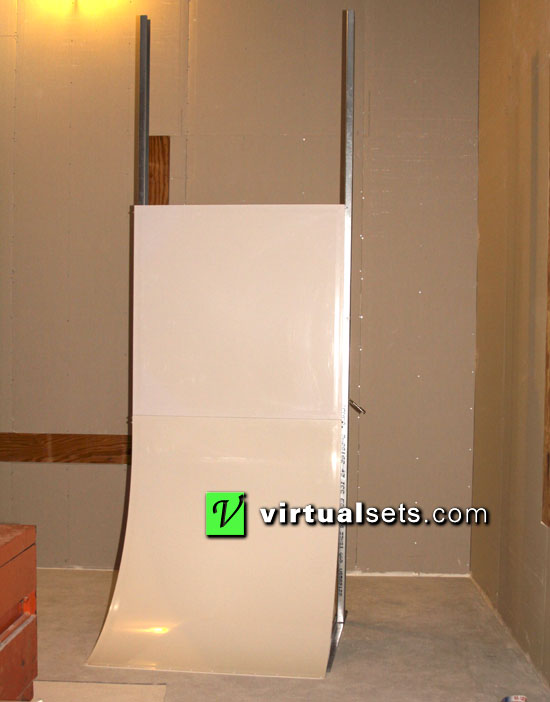
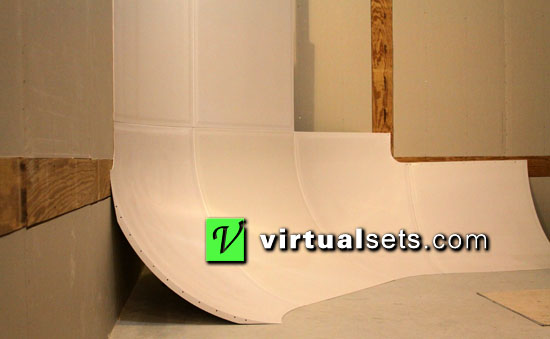
Pro Cyc Built-in Installation with Free-standing Expanded Corner - The narrow
areas with plywood have had sheetrock removed.
Installation of Pro Cyc 3-EZ with Expanded Corner.
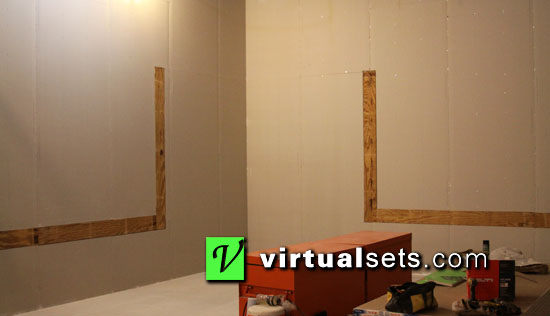 |
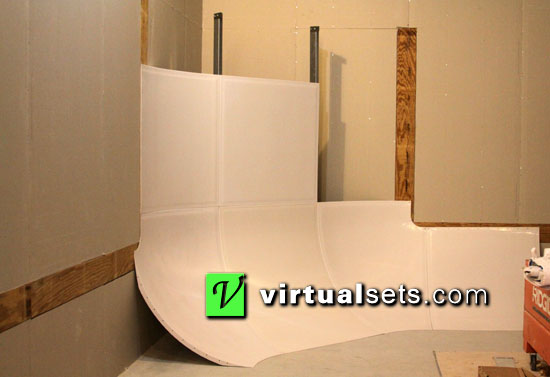
Pro Cyc Built-in Installation with Free-standing Expanded Corner - The
plywood strips are to provide a solid base for attaching the Pro Cyc cyclorama
green screen modules.
Diagram of Pro Cyc 3-EZ with Expanded Corner - Revit Family available.
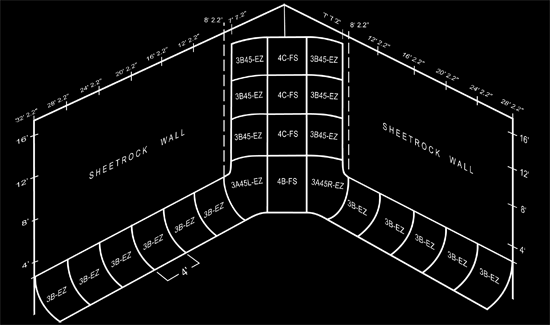 |
Pro Cyc Built-In with Free-Standing Expanded Corner Installation - Overall Diagram.
Pro Cyc Free-Standing Module.
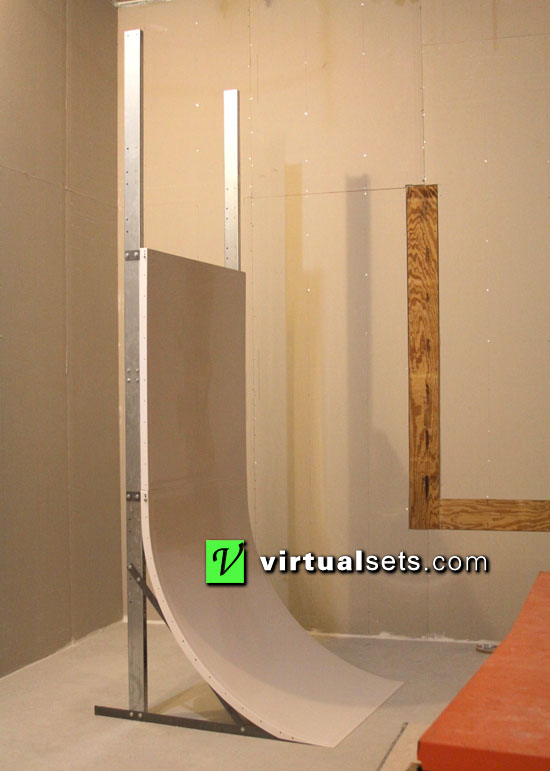 |
Pro Cyc Built-in Installation with Free-standing Expanded Corner - This is a
side view of the center of the expanded corner, showing the support structure.
Diagram of Green Screen Vertical Frame.
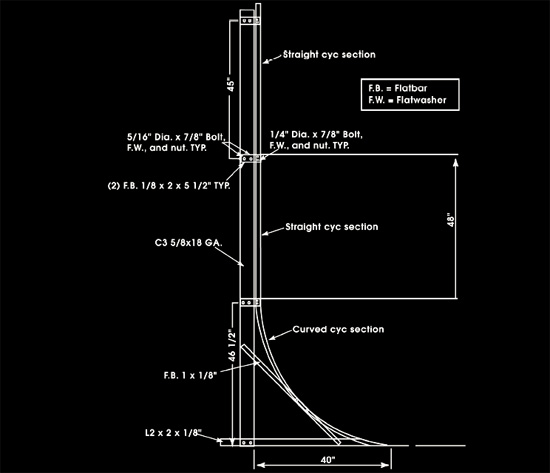 |
Pro Cyc Free-Standing Installation - Detail Diagram.
Free-Standing Installation Detail.
 |
Pro Cyc Free-Standing Installation - All metal studs and
the first row of cyclorama modules have been installed.
Pro Cyc Installation - Free-Standing Base
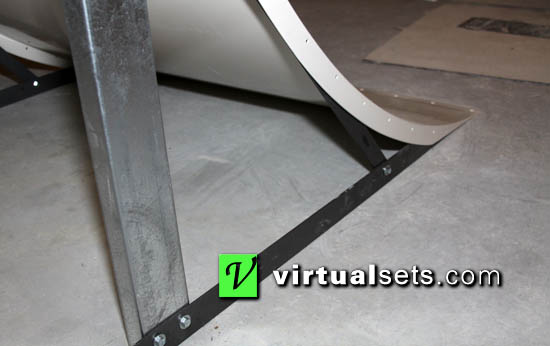 |
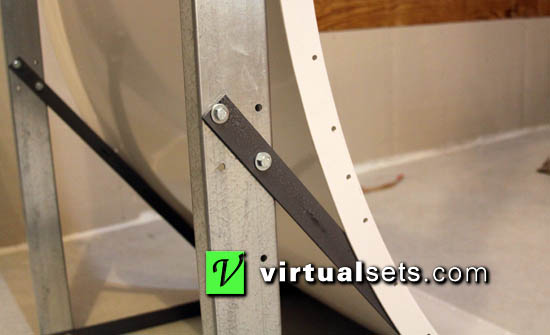
Pro Cyc Expanded Corner Installation - The L-shaped metal foot provides
a solid base for the vertical support and diagonal flatbar. The L-shaped metal
foot is tapered at the end where the curve meets the floor.
Pro Cyc Rear View Installation Photo.
 |
Pro Cyc Expanded Corner Installation - Vertical support and flatbar, plus
joint of two modules.
Pro Cyc Installation - Free-Standing Base Support.
 |
Pro Cyc Expanded Corner Installation - The diagonal flatbar provides support
for the module and stability to the vertical support.
Pro Cyc Free-Standing Center Modules.
 |
Pro Cyc Built-in Installation with Free-standing Expanded Corner - This is a
front view of the center of the expanded corner, showing the support structure.
It is moved into place with adjacent modules in the next photo.
Pro Cyc Free-Standing Modules - Transition to Wall.
 |
Pro Cyc Built-in Installation with Free-standing Expanded Corner - This is a
view of the expanded corner, with adjacent modules in place. On the right is the
first of the 3B-EZ modules that will extend 28' to the right and 32' to the left
(nearer the camera).
Connecting the Pro Cyc Modules to the Plywood Base.
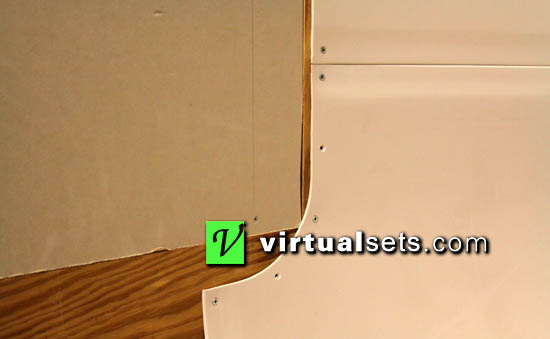 |
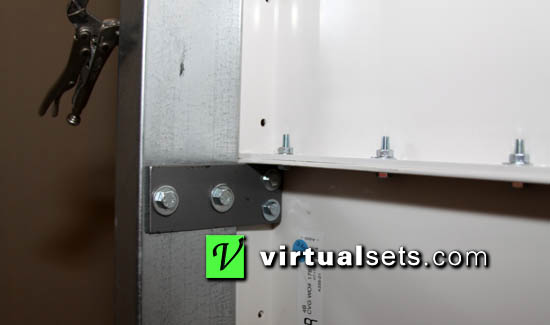
Pro Cyc Green Screen Installation - A detail shot of the connection to the
plywood strips that were installed flush with the sheetrock. A typical mud and
tape drywall process will taper the edges to create a seamless cyclorama.
Connecting the Pro Cyc Modules to the Plywood Base.
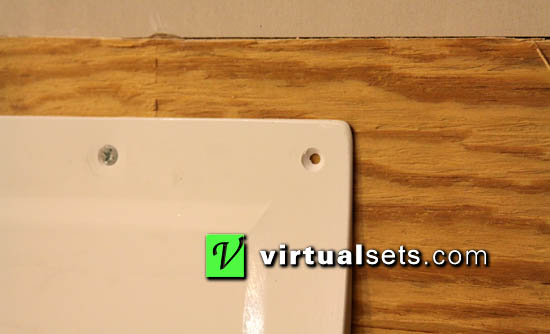 |
Pro Cyc Built-in Installation - A detail shot of the countersunk holes that allow
the screws to attach the modules to the plywood strips. This shows a close-up
view of the far right corner of the photo below. A typical mud and tape drywall
process will taper the edges to create a seamless cyclorama.
Beginning Installation of Curved Modules on the Right.
 |
Pro Cyc Built-in Installation with Free-standing Expanded Corner - This is a
view of the expanded corner, with adjacent modules in place. On the right is the
first of the 3B-EZ modules that will extend 28' to the right and 32' to the left
(toward the camera).
Completed Pro Cyc 3-EZ with Expanded Corner Installation.
 |
Pro Cyc Built-in Installation with Free-standing Expanded Corner - Completed
Installation.
Contact us for more information!
All content ©2007-2016 Pro Cyc, Inc. and Virtualsets.com, Inc. All rights
reserved.
|